Create your AiiDAlab app#
There are two approaches to develop a new AiiDAlab app:
The easiest and recommended approach is to create a new app with the AiiDAlab app cookiecutter.
Of course, one can also create an app step by step from scratch.
Tip
When developing apps directly on the host machine via bind mount, a difference in the user’s UID and GID between the AiiDAlab environment and the host machine might cause permission issues.
In case that you use vscode as your IDE, you might find the Attach to a running container feature useful that allows you to edit files directly inside the container without needing to mess with the onwership of files.
Create app with cookiecutter#
Open the terminal from the AiiDAlab app start page by clicking on the “Terminal” () icon on the start page.
Then, execute the following steps:
~$ cd apps
~/apps$ cookiecutter https://github.com/aiidalab/aiidalab-app-cutter.git
app_name [my-app]:
...
After answering all questions posed by the cookiecutter, you will find a new folder inside the apps/ directory that contains the basic scaffold structure for an AiiDAlab app.
The newly created app will also show up with a rendered banner on the start page after a reload:
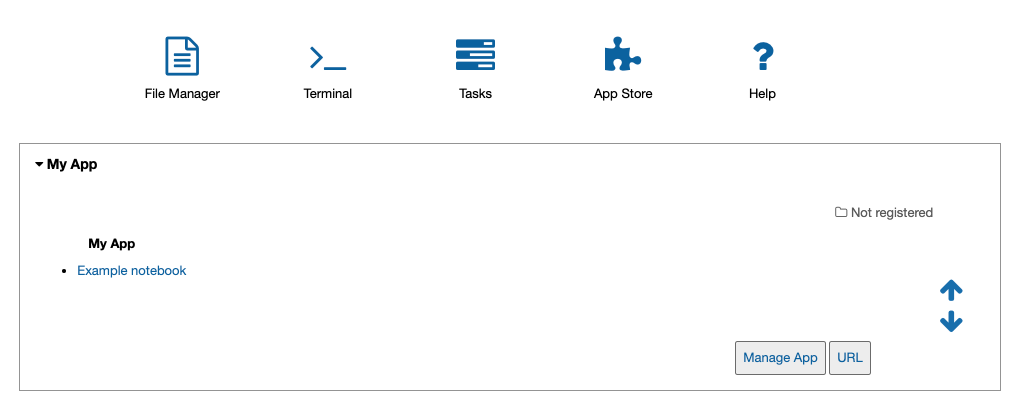
The start banner of the newly created app.#
AiiDAlab expects that app source code is managed with git. To start tracking the app development with git, within the terminal, execute:
~$ cd apps/my-app/                              # enter the app directory
~/apps/my-app$ git init                         # initialize git repository
~/apps/my-app$ git add -A                       # add all files
~/apps/my-app$ git commit -m "initial commit"   # create initial commit
Create app from scratch (step-by-step)#
Typically one would prefer to use the cookie-cutter to create a new app, but here are the steps to create an app from scratch.
Open the terminal by clicking on the “Terminal” icon and then create a new app with:
~$ git init apps/my-app
If you reloaded the start page, you would already see the banner of the app show up on the start page.
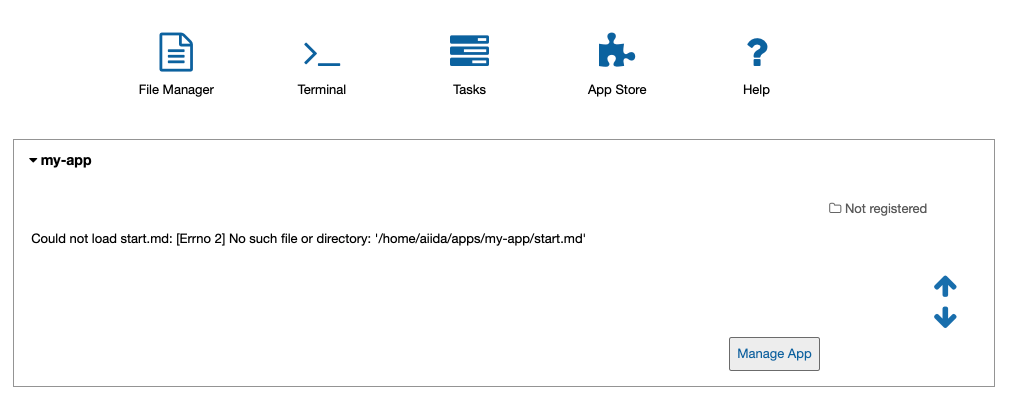
Newly created AiiDAlab app (missing app metadata).#
However, it is obvious that there are still a few things missing.
To provide app metadata, we need to create a setup.cfg file that contains basic information about the newly created app.
You can create the file either with the Jupyter interface or directly in the terminal, e.g., with vim:
Open the file manager by clicking on the icon on the AiiDAlab start page.
Navigate to the
~/apps/my-appdirectory.Click on “New” and then “Text file” to create a new file.
Rename the file to
setup.cfgby clicking onuntitled.txtat the top and entering the new name.Copy the following snippet into the file and adjust it for your needs:
[aiidalab]
title = My App

[metadata]
name = aiidalab-my-app
version = 0.1-alpha
author = J. Doe, G. Verdi
description = A new AiiDAlab application that I just created.
Save the file by clicking on “File” and then “Save”.
Open the terminal () and then start editing the
setup.cfgfile with:$ cd ~/apps/my-app ~/apps/my-app$ vim setup.cfg
Copy the following snippet and adjust it for your needs:
[aiidalab]
title = My App

[metadata]
name = aiidalab-my-app
version = 0.1-alpha
author = J. Doe, G. Verdi
description = A new AiiDAlab application that I just created.
See also
For more details about specifying metadata for your app, see Publish your AiiDAlab app.
To add a logo for your app, simply add the URL to your logo file as a project url to the setup.cfg metadata block.
For example, if you submit the logo image file as part of your repository on GitHub, you could use a URL similar to:
{
   [metadata]
   ...
   project_urls =
         Logo = https://raw.githubusercontent.com/aiidalab/aiidalab-hello-world/master/img/logo.png
}
The ... is a placeholder for the previously added metadata.
The start banner is the widget that shows up on the AiiDAlab start page and that provides users the entry point to your app.
You can create a static banner by adding start.md file to the app directory, or a dynamic banner with a start.py file.
In the majority of cases you would want to create a static file, here is a minimal example:
- [My App](./main.ipynb)
Like the setup.cfg file, you can either use the File Manager or the Terminal to create the file.
Note
The name of the notebook is arbitrary, but should of course match with the link.
All paths are relative to the app’s root directory (e.g. apps/my-app/).
Creating a new app for AiiDAlab and making it show up on the start page is of course only the first step. Now we need to actually make it do something.
In the previous step we created a link to a main.ipynb file.
However, that file does not exist yet, which you would have immediately noticed in case you tried to open it.
Create the file by going back to the “File Manager” (navigate to apps/my-app if needed), and then clicking on “New” and “Python 3”.
Rename the file to main and then add the following line into the first cell:
print("Welcome to my app!")
Save the notebook and close it.
Now go back to AiiDAlab start page and click on the My App link again - it should bring you to a page that says “Welcome to my app!”
In case you encounter any issues, compare your app to the source code of the hello world app that was templated by the cookiecutter approach.
Next: Use AiiDAlab widgets